R Markdown
This is an R Markdown document. Markdown is a simple formatting syntax for authoring HTML, PDF, and MS Word documents. For more details on using R Markdown see http://rmarkdown.rstudio.com.
When you click the Knit button a document will be generated that includes both content as well as the output of any embedded R code chunks within the document. You can embed an R code chunk like this:
summary(cars)
##      speed           dist
##  Min.   : 4.0   Min.   :  2.00
##  1st Qu.:12.0   1st Qu.: 26.00
##  Median :15.0   Median : 36.00
##  Mean   :15.4   Mean   : 42.98
##  3rd Qu.:19.0   3rd Qu.: 56.00
##  Max.   :25.0   Max.   :120.00
Including Plots
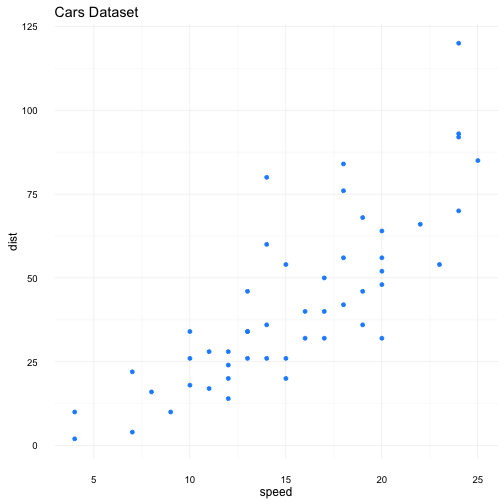
You can also embed plots, for example:
library(ggplot2)
g <- ggplot(cars, aes(x=speed, y=dist)) +
     geom_point(color="dodgerblue") +
     theme_minimal() +
     labs(title = "Cars Dataset")
print(g)
Directions for writing Rmd to Md files for Jekyll blogs
- Launch RStudio, Start project in _drafts folder of your jekyll page repo
- File > New File > R Markdown file
- Edit yaml header to mimic jekyll with title and layout parameters and save file a. make sure to include the figure path in the knitr chuck options: knitr::opts_chunk$set(fig.path=’https://jasdumas.github.io/post_data/exploring-the-cars-dataset-‘) with your desired folder outputs
- First time only: create r2jekyll.R file which creates the .md file and does some house keeping about figures
- Go to Terminal and change directory to the drafts folder
cd /Users/jasminedumas/Desktop/GitHub\ Clone\ Repos/jasdumas.github.io/_drafts/ - Change permission of r2jekyll.R file with:
chmod +x r2jekyll.R - Execute
./r2jekyll.R demo.Rmdchanging the .Rmd file name